Showing posts with label Frame. Show all posts

Thursday, March 5, 2026

Friends are Flowers

 Happy Thursday AI Friends!

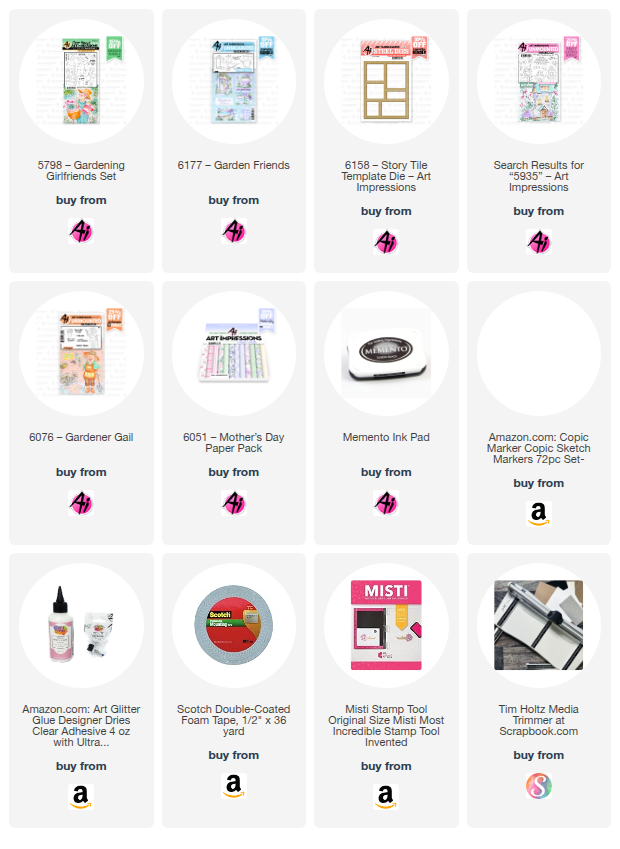
Oh Man, I had such a fun time making this card.  My inspiration came from a combination of the newly released Story Tile sets and die as well as the current blog challenge "The People In Your Neighborhood".  For my card, I used the #5798 - Gardening Girlfriend set, the #6177 - Garden Friends set and the #6158 - Story Tile Template Die as well as a few accessories from some other sets that are listed below.  


I started by stamping all of the images onto copic friendly paper with Memento black ink and colored with my copic markers listed below.  I decorated some of the images with my white marker (you can also use the Dr. PH Martin white paint).  I fussy cut the girl as well as the story tile garden images.  

I cut the story tile window frame from a piece of pink cardstock and a piece of pattern paper from the #6051 - Mother's Day PP.  I layered the pattern paper over the pink cardstock and shifted it slightly to the right and upwards so that the pink showed through the window slightly.  This provided a nice little contrast and helped pop up the images as well as the pattern papers underneath.  Then a die cut some other pattern papers from this paper pack with the story tile die and placed them behind the pink frame.

I stamped the sentiment from the Garden Friends set and adhered behind the narrow window.  I popped up each of the images with foam tape into the other windows and decorated the pots and boots with flowers from the #5935 - Fairytale houses set and the #6076 - Gardener Gail set.  To finish off the card, I colored a few bees from the Fairytale Houses set and placed them near the flowers. 

Make sure to check out the newly released sets and also the bi-weekly blog challenge for a chance to win a free stamp set of your choice.  We love to see your creations!

Thanks for joining me today!  Have a wonderful day and keep creating!

Copics used:  E00, E01, E11, E21, E23, E25
R20, R24,      C1, C3, C5
Y32, Y35, Y38,   YG41, YG45
B91, B93, B95,    RV52, RV55

Thursday, January 15, 2026

Wanna Build a Snowman

 Happy Thursday AI Friends!

I have a cute little snowman card for you today using the #6085 - Woodland Snowman Scene stamp set.  The stamp sets in this series fit nicely within the #4619 - Window die.  A great way to highlight the scene and add a touch of interactive to your card.


I began by stamping the scene onto copic friendly paper with Memento black and coloring with my copic markers listed below.   I cut the window die from red cardstock using the #4619 - Window die.  I cut the front panel and card base using the #5408 - Shadow box window to position the scene behind the window.  I created the sentiment using my computer and die cut with a tag die from my stash.  I placed a few red hearts onto the card for an extra touch of fun.

Lastly, I added a bit of wink of stella to the hillsides and the snowman.  It isn't noticeable in the above picture so I zoomed in to show below.

Thanks for joining me today!  

Have a great day!  Enjoy and keep creating!

Copics used:  N0, N1, N2, N4, N6, N7
R8, R20, R22, R24
E21, E23, E93, E95, E97
BG70, BG72
B0000, YR16, YR18
YG61, YG63, YG67

Thursday, October 30, 2025

Spider Mania

 Happy Thursday AI Friends!

Halloween was never one of my favorite holidays, but now, with all of these cute sets from Art Impressions, it has climbed the ladder to second.  I can't seem to stop creating with all of these images and since Halloween is tomorrow, I thought I'd share two projects.  Both of these were inspired by the "Along Came A Spider" challenge currently on the blog.  

The card below is a pop up frame card.  Push the sides in and the frame pop ups and away from Frankie.  When the sides are pulled out, the card flattens to a 5 x 7 for mailing.  Frankie's legs also wiggle side to side as well as his eyes.  I used #6120 - Frankenstein Puppet, #5604 - Halloween Journal dies and the #5462 - Web dies set to create this card plus added a few sets of wiggle eyes (check out the little spidey on the left).  LOL!

To make the card, cut two pieces of 5 x 7" black cardstock.  Score both pieces at 1/2", 1", 6" and 6 1/2" along the 7" side.  For the front, fold one piece as valley, mountain, mountain and valley (V,M,M,V) and the back piece, fold just the opposite (M,V,V,M).  I recommend you decorate both pieces at this point so you can lay flat to glue decorations securely.  You can place Frankie inside the frame at the end to position him just where you want him.  Glue the front and back ends together with the 1/2" tabs on each side.

To make the dancing Frankie, cut all the pieces with the puppet die set, but hold up on the pants.  You will need to cut an extra shirt piece from scrap cardstock.  For the pants, you will need to stretch his legs.  To do this, you will need to partial cut the legs up to the top of his pants by placing your cutting plate just under the cut line (of the top of the pants) so that it won't cut.  Then free hand cut an additional 1/2" for the top of the pants (see below).  I also rounded off the top corners of his pants.  At the top of the pants (about 1/4" from top), punch a hole big enough for a pop dot to fit through freely.  You may have to snip a little bit of the hole to make it larger.  Place one side of the pop dot to the back of his shirt.  Place the pants with the hole over the pop dot.  Place foam tape onto the back side of the shirt and adhere the extra shirt piece onto the pop dot and foam tape.  The legs should move freely at this point.  Decorate the rest of your Frankie as you desire.  Glue him into place inside your frame card.


To make the ghost tag, I used the scraps from my card above.  This is always a great way to use up your scraps and create an extra tag, card, etc. for future.   I die cut the ghost, spider and banner from the #6111 - Spooktacular set.  The bow from the #5811 - Gift card pocket die set and the spider webs from the #5604 - Halloween Journal die set.  I inked the ghost with black distress oxide ink and glued to a black die cut ghost to use as a shadow.  Decorated her with cute little wiggle eyes and a bow on top of her head.  I die cut two banners (one in black for the shadow) and wrote the word "spider!" across the white one.  I cut the bow from scraps and attached a spider web behind it and placed a spider on top.  Added a few more webs, spiders, ribbon on top and a little red heart and the tag is finished.


I hope you enjoyed my projects today.  Thanks for stopping by!  
Make sure to enter the challenge and show us your creation of "Along Came A Spider".  We love to see what you create!!

Happy Halloween!  Keep on Creating!
Copics used:  R20, T0, T2, T4

Thursday, October 2, 2025

Winter Wonderland

 Happy Thursday AI Friends!

I was having too much fun making cards for the current Blog challenge "In The Navy" so I'm sharing two of the them with you today.   I used the #5953 Woodland Critters and #5954 Woodland Bears.  These would make such a cute gift set for that special someone that has everything.  What's better than giving/receiving handmade gifts?


I started out by stamping the images onto copic friendly paper with Memento black ink and colored with my copic markers listed below.  Each of the images in both sets come with corresponding dies.  As usual, I die cut an extra set from heavy cardstock.   I love the dimension and stability.

Card #1:  I created a fun pull tab interactive card where the critters slide down the hill when pulling the tab.  This is a square 4 3/4 inch card.  To make the stitch border, I partial cut two sides using the largest #5063 Rectangle A2 Double Stitch die and then cut the other sides to make this large square.   I spattered Dr. PH Martin's Bleed Proof White paint onto the navy blue cardstock base to create a snowy background and also glued some of the snow die cuts that were left over from card #2.  The stitch snowy hills were using dies from my stash. 
Card #2:  I created a popped up frame card.  Using the #5782 Snowflake Frame die, I die cut two frames with heavy cardstock and glued them together.  Saved some of the snowflake pieces from the frame die cuts and used on card #1.  This card measures 3 1/4 x 4 1/4 inches.  I spattered Dr. PH Martin's Bleed Proof White paint onto the navy blue cardstock base to create a snowy background.  Again, I used a curvy stitched die from my stash to create the snowy hillside.  I popped the frame and the images up using foam tape onto the hillside.  Added a bow and the card is finished. 
Hope you enjoyed my cards today and you decide to join us in the Blog challenge.  See above tab for details and a chance to win a free stamp set.  We love to see your creations!

Have a great day and keep creating!

Copics used:  E30, E33, D35, E37, E40, E41, E43, E44
E51, E53, E55, E57, E59
N1, N2, N3, N4
Y13, Y17, Y19, 23, Y26, 
R20, R22, R24, R27
BG90, BG93, BG96, BG99
BV20, BV23

Thursday, September 18, 2025

Koala-Ty Time

 Happy Thursday AI Friends!

This week's blog challenge is "Wild About You" showcasing any animal, or animal print, stamp, die, etc.  Many AI stamp sets work with this challenge, but since I found a leafy felt fabric, I thought it would be perfect to use with the #5349 - Koalas set.


I stamped two Koalas from this set, as well as the sentiment, onto copic friendly paper with Memento black ink and colored with my copic markers listed below.   I die cut each of the Koalas using the coordinating dies included with the set.  I also cut another pair of Koalas from heavy cardstock to back the colored image so they would pop up on the card with more stability.  I used the leaf die from the #5805 - Mini Journal box to cut several green leaves.  The sentiment was cut using the #6045 - Scalloped Circle die and popped up in the center of the frame panels.

The background frame, as well as the other leaf, were cut from dies I had in my stash.  To finish off the card, I used some enamel dots and placed them on three of the panels.  

Thanks for joining me today!  I hope you show us your creations by entering in the blog challenge.  See above tab for details and your chance to win a free stamp set of your choice.  
We always love to see what you create!

Have a wonderful day and keep creating!
Copics used:  W0, W1, W3, W5
E21, E23, E24
R20, G43, G46
B12, B14

Thursday, September 11, 2025

Sit, Stay, Heal flip card by Dori Mendiola

 Happy Thursday AI Friends!

Today I have an interactive get well card using the #AICS38 - Doggy Kisses set.  When you open the card, the image flips to the inside. 

 I started by stamping the images with Memento black ink onto copic friendly paper and colored with my copic markers listed below.  I die cut the images using the #5065 Oval Double Stitch and the #5135 Hexagon Double Stitch dies.  I fussy cut and popped up the kleenex and tea cup using foam tape.  I die cut an oval into the front of the card panel and used the blue inner panel for the flip base.


For the mechanism - cut a piece of cardstock 2 3/4" x 3" and score at 3/4, 1 1/2 and 2 1/4 along the 3" side.  Fold and crease the score lines to create a tube.  Place glue on the underside of the first fold area only.  Glue down to the inside fold of the card.  Fold the tube in half and place glue on the upper fold area only.  Bring the top half of the card over and shut on top of the tube piece.  The tube will show through the top of the card, but the image panel will cover when closed. 
 
Now cut a piece of cardstock 3/4" x 2 1/4".  Score in thirds along the long edge (3/4" each piece).  Glue one 3/4" tab to the top of the tube piece in the center.  Fold the other end upwards and lay the tube down flat so that the card is shut.  Place glue on the upwards tab only.  Place the blue image panel into the front oval cutout area and adhere it onto the tab with the glue.  The image panel will pop up thru the oval cutout on the front of the card when shut and it will pop thru to the inside of the card when opened.

Decorate your card with sentiments, ribbon, etc.

Thank you for joining me today!  Hope you have a wonderful day!
Keep creating!

Copics used:  N0, N1, R20
E50, E51, E53, E55
E41, E42, E44
E33, E35
BG70, BG72, BG75

Thursday, September 4, 2025

Teeny Teapot

 Happy Thursday AI Friends!

My card today was inspired by the current challenge "When a Door Closes" utilizing the #5935 Fairytail House set.  This is the cutest set and makes the cutest teeny cards.  Back in December 2024, I created a Teeny Shoe card utilizing this set.   Here is the link to that post.  https://artimpressionsstamps.blogspot.com/search?q=teeny+shoe

For this challenge, I used the Teapot stamp and die and placed it on a teeny tiny hexagon card.  It's approx. 2 1/4 x 2 1/4 inches.  


I created the hexagon card by die cutting two pieces from heavy cardstock.  I scored one of the hexagons about 1/4" from the top and folded towards myself.  I placed glue on the scored fold and adhered the other hexagon to it creating the card base.  I then die cut another hexagon out of pattern paper from the #5742 Easter PP and glued that to the front of the card base.  I created a stitched frame and adhered that to the pattern paper front.

I stamped the teapot and the bee from the #5935 Fairytail Houses set onto copic friendly paper with memento black ink and colored with my copic markers listed below.  I die cut the images and cut a second bee out of heavy cardstock to create a popped up effect.  I adhered the images to the card base and stamped a sentiment in the inside and the card is ready to adhere to a gift, hand deliver or send in the mail.  A fun little card to receive!

I hope you enjoyed my card today and you decide to play along in the blog challenge "When a Door Closes".  Any card/project with a door will qualify you for a chance to win a free stamp set.  

  We love to see your creations!

Hope you have a wonderful day!  

Copics used:  E51, E53, E55
T0, T2, T4
Y00, Y11, Y13, Y15
V12, V15, G40, G43

Thursday, August 7, 2025

Gnome Frame

Happy Thursday AI Friends!

Today I have a cute little frame that fits right in with the current blog challenge called "Stitches and Scallops".  I love this little #5902 - Mini Scallop Frame set.  It makes the cutest little display card for a desk, mantel, shelf or anywhere for that matter.  This one with the gnomes brings a smile to my face.
        

I began by stamping the images onto copic friendly paper with Memento black ink and coloring with my copic markers listed below.  The gnomes (5785 - Gnomes set) and the bees (5935 - Fairytale Houses) were cut using their corresponding dies that are included in these sets.  
The scene was stamped onto a 3 x 2 1/2" piece of copic friendly paper.  The tree stump is from the 2025 freebies part 1.  If you don't have that freebie, you can use the stump from the KH5951 - Foxes set and draw in the door and window.  I colored, free hand, the walkway and the grass.  Don't look too close because they are pretty rough.  😞  The leaves were stamped with Memento black ink using the 5989 - Dwelling Foliage set and colored with my copic markers.

I die cut the frame from a piece of striped paper from the 6012 - Basic Yellow PP using the #5902 - Mini Scallop Frame die.  I also die cut the oval opening using the #5727 Nested Oval die.  I then die cut a stitched oval frame to place on the outside of the oval opening using the #5065 - Oval Double Stitch die with a slightly larger nested oval from the #5727 - Nested Oval dies.

I popped the gnomes up on foam tape and adhered one to the top of the stump and the other to the outer side of the stitched oval frame.  I adhered one bee directly to the image and the other to the outer frame.  Lastly, I cut the sentiment banner from the #5588 - Journal Oval Frame set and stamped the sentiment from the #5785 Gnomes set onto the center of the banner.  

Oops, almost forgot the easel.  Make sure to die cut one from the #5902 - Mini Scallop Frame die and adhere to the backside of the scallop frame so that it stands nicely.


That's it for me today.  Hope you play along and enter the challenge "Stitches and Scallops" to win a free stamp set of your choice.  It's easy and so fun (especially if you win). 😁

Have a great weekend and keep creating but make sure to share because we love inspiration!
Copics used:  E01, E11, E21, E23, E25
W0, W1, W3, W5
Y15, Y17
B32, B34
G40, G43

Thursday, July 10, 2025

Golden Mermaid

 Happy Thursday AI Friends!

My card today was inspired by the current blog challenge "Spritz, Splatter and Paint!"  A perfect way to showcase the new Winsor Newton Ink 14ml - Gold Paint sold now on the Art Impressions website.  Although the challenge does not stipulate that you have to use gold, you can use any spritz, splatter or any color paint.  I chose to use the new product, since it was new to me too.

This gold paint is awesome and adds such glimmer and shimmer to your project.  I played with it a little bit to see how I wanted to use it.  I loved the look with stencils and a makeup sponge, smooshed onto the paper and spritzed or splattered.  For my card, I chose to paint with it, stamp it and also used it in a mister (mix with a touch of water in a mister).  


I stamped the #5903 - Treasured Armful Mermaid images onto copic friendly paper with Memento black ink and colored with my copic markers listed below.  I then die cut each of the images using the coordinating dies that come with the stamp set.  I'm using a background that I made awhile back but thought it would be perfect for this card.   Using the backside of photo paper, I believe I used Ranger alcohol inks - Mermaid and Glacier - but any blues will work.  I also used a bubble frame die that I had in my stash.    


I painted the treasure chest with the Winsor Newton gold paint as well as the middle of the flower in her hair.  When you zoom in, you can really see the result.  I painted some gold onto the sentiment stamp and stamped it onto white cardstock.   But, I liked the use of the gold paint in a mister the best.  This produced the best shimmer and still left the color underneath showing through.  See the sand in the picture above and the mermaid tail and hair in the picture below.  One or two mists will do the trick, but it's hard to stop.  I actually sprayed too much the first time but was able to wipe some of it off.  Wait until it slightly dries first, then wipe a paper towel lightly over it.    


After all the images were colored, painted and sprayed, I assembled the card.  This little mermaid actually swings back and forth as if swimming.  
Punch a hole in the background behind where her head will be, large enough for a foam pop dot.  Glue a penny, button or paper disc to one side of the pop dot.  Place the pop dot through the hole from the backside and adhere the mermaid (approx. forehead) to the pop dot poking through.  She should rock nicely at this point.  Place a thicker layer of foam tape on the backside of the background avoiding the penny, button, or disc.  Adhere onto your card base.  Test to make sure that she moves freely.  Pop up the frame so it is slightly higher than the inner square.  This will help stop her movement so she doesn't flip all the way around.

I hope you join in our blog challenge for a chance to win a free stamp set.  We love to see what you create!
Have a wonderful day and keep crafting!

Copics used:  E000, E01, E11, R20
E30, E31, E33, E35, E37, YR31
RV63, RV66; V05
YG09, BG05

Thursday, June 19, 2025

Baby Boy Panda Bear

 Happy Thursday AI Friends!

Today I have a cute little baby boy card for you using the #6017 - Baby Panda set.  This is the absolute cutest little set and makes the cutest baby cards!  


I started out stamping the images on copic friendly paper with Memento black ink and colored with my copic markers listed below.  I cut each out with the corresponding dies that come with the stamp set.  To create the background, I using my cloud stencil and Distress Oxide Broken China ink.  The papers for the frame and the grass are from the #6011 - Basic Teal PP and the #6009 - Basic Green PP.  I paper pieced one of the balloons and the carriage sun cover using the #6036 - Easter Bunny PP.

The upper panda moves as if floating in air (see video).  This is a simple interactive mechanism. 
To provide more stability to the swinging panda, I suggest die cutting a second panda w/balloons out of heavy cardstock and adhere to the backside of the colored image.  Punch a circle in the cloud background, small enough to hide behind the balloon.  Place a foam dot in the center, adhering the bottom side to the card base, and the top side of the foam dot to the back of the top balloon.  The panda will swing back and forth as if he is floating in air.   

I hope you are having a wonderful start to your summer!  Have a great weekend and thanks for joining me today!

Copics used:  C00, C0, C3, C5, C7
B00, B12, B14
Y11, Y13, Y15, Y17
YR12, YR14, YR16
G40, G43
R20, R22

Thursday, May 22, 2025

Girlfriends

 Happy Thursday AI Friends!

Today I have a card that I made for one of my best girlfriends.  I don't know about any of you, but the Art Impressions girlfriends stamp sets are my favorites!!!  Bonnie has done such a great job with each of the characters in these images.  I just love the fun and laughter expressed in each and every one of the girlfriends faces.  Sooooo relatable!  

The #4129 Uptown Girls stamp set actually has four girlfriends but I stamped only three.  Sometimes it's fun to adjust a stamp set to give it a different look.

I stamped the image with memento black ink onto copic friendly paper and colored with my copic markers listed below.  I originally colored the middle girlfriend with a solid yellow top but it was just too overpowering so I stamped the image onto pattern paper and fussy cut her top and glued it over the yellow one.  Toned it down and I like it much better.  Don't ever throw away an image because you don't like the way you colored a part of it.  You can always fix it by paper piecing or covering with a sentiment, etc.  Just depends what you don't like.  One time, I even went so far as to stamp, recolor and paper piece the hair.  It worked and I saved the image to use on another card and no one was the wiser (except my friends that saw me do it).  LOL!  

I stamped the sentiment, that is in the stamp set, at the top of the image panel.  Using a die cut from my stash, I matted the image onto a pattern paper frame using the #5873 Mini Birthday paper pack and then again on yellow cardstock.   I then placed that onto a blue checkered piece of pattern paper from the #5940 Journal Cover Paper Pack - Plaid.  To finish the card, I placed little die cut stars around and adhered a bow. 

Remember to review your stamp sets and see how you can change them up to give them a slightly different look.  Adds fun to your card making.  

Thanks for joining me today and I hope you enjoyed my card.  

Have a great day and keep creating!

Copics used:  E000, E00, E01, E11, E21, E23, E25
C00, C1, C3, C5, R20, R22
Y21, Y32, Y35, Y38
YG21, YG23, YG25
B0000, B000, B91, B93, B95

Thursday, April 17, 2025

Sweet Baby Girl and more Easter treats

 Happy Thursday AI Friends!

I have a couple of projects for you today.  The first one was inspired by the current blog challenge - ABC, 123 and then a few more Easter treat containers for the holiday.  I got carried away and was having too much fun so I just had to share!

When I think ABC, 123, I think baby and block letters.  So, guess what I created for this challenge?  Yep, a baby card with block letters on the inside.  ;)

 My card features the #5904 So Sweet Armful Elephant as well as the #5911 Large Numbers and #5912 Large Alphabet dies.  I also used the paper packs - #5742 Easter PP and #5940 Journal Cover Plaid PP.  I started with the inside of the card by cutting an A2 card base, folding in half and placing two 4 1/8" x 5 3/8" pieces of pink cardstock onto each inner side.  Depending on the number of letters, measure an even space between each and allow 3/4" for each letter.  So, for four letters, I marked, on the folded white side, at 1/2", 1 1/4", 1 3/4", 2 1/4", and so on adding 1/2" then 3/4" along the remaining fold.  Cut, away from the fold, 1" on each of the marks.  See diagram below.

Open the card and fold the 3/4" tabs to the inside so that they pop up.  Add the dot pattern paper to the inside right and left sides.  Die cut the letters from heavy cardstock and pattern paper.  Glue together and mount onto the scallop frame and then onto the left and right sides of the 3/4" tabs.  The inside of the card is finished.

For the front of the card, cut a piece of plaid cover paper 5 1/2" x 8 1/2+" (slightly larger to allow for the fold).  Adhere to the outside A2 card base and trim off any excess.  Adhere the corner edges to the plaid paper.  Your card will be thick so to create a nice closure, place a piece of ribbon around the card and adhere under the front frame.  Decorate with the elephant, number and sentiment.

For the Easter Treat envelope and basket:


I used the #5869 Easter Bunny Puppet for both of these Easter projects as well as several of the Easter paper packs.  
The envelope above was created with a piece of 6 x 6 paper.  Fold one corner across to the other creating a triangle.  Take the left point and fold over the front to the middle.  Take the right point and fold to the left point.  Adhere both of these down.  Lastly, take the front piece of the top triangle, leaving the back, and fold down over the front.  Adhere down and glue your bunny over the top.  Fill the pouch with easter goodies.
The basket was also created with a 6 x 6 piece of paper.  This is the same fold as the box from last week's post except you don't bring the sides all the way up creating a basket vs. a box.  Score at 2" and 4", turn and score again at 2" and 4".   On one side, cut the two score lines to the first fold.  On the opposite side, cut the two score lines to that first fold.  You should have three connected squares on the left of the first cut score line and three on the right of the second cut score line.  Fold in the middle pieces and then fold in the sides until the two top points, on each side, come together.  Adhere down.  For strength, I cut three 2" x 2" pieces of heavy cardstock and glued one to the bottom of the basket and one to left and right inside ends.  Using the #5804 Decorative Belly Bands, I die cut a decorative band from pattern paper and also from heavy cardstock.  Layered them together and adhered the ends to the inside of the basket.  I adhered the bunny and filled the basket with treats.


I hope you enjoyed my projects today!  Thanks for joining me!  
Make sure to enter the blog challenge for a chance to win a free stamp set.
Have a wonderful day and a very blessed Easter weekend!