Showing posts with label Girlfriends. Show all posts

Thursday, March 12, 2026

Pickleball Wobble

 Happy Thursday AI Friends!

The Art Impressions people stamps are a huge hit with me!  Bonnie does such a fantastic job with the characters and their facial expressions.  When she created this last set of AI People, I was in love and then she added papers to fit each.  What a wonderful way to create a card in a hurry!  Plus I added a wobble behind her and now she plays with a wiggle.  LOL!


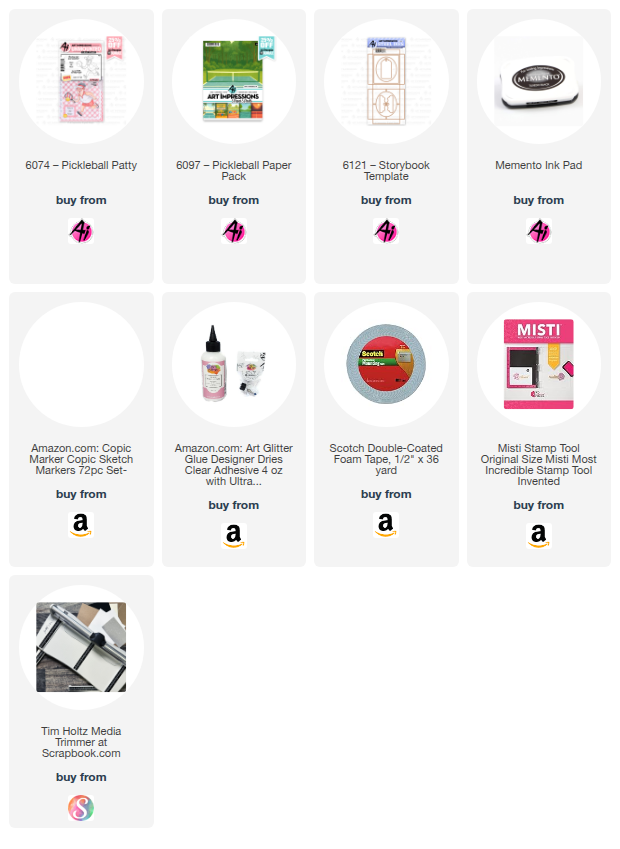
My card today uses #6074 - Pickleball Patty and #6097 - Pickleball PP.
I started by stamping the image onto copic friendly paper with memento black ink and colored with my copic markers listed below.  I cut the image out using the corresponding die included with the stamp set.  I also cut a second one with blank cardstock and glued to the back of the colored image.  I then added an action wobble to her back and adhered to the pattern paper.  She actually wobbles when she plays now.  
 Lastly, I added the sentiment, a bow and a pickleball pin.

Thanks for joining me today!  Hope you have a wonderful day!
Keep creating!

Copics used:  E00, E01, E11, E21, E23
T0, T2, T4, T6
R20, R22, R24
Y000, Y13, Y15
YG41, YG45

Thursday, August 21, 2025

Golfer Gal - Birdie Betty

 Happy Thursday AI Friends!

I have a fun interactive card to share with you today that meets the bi-weekly challenge 
"Sports & Leisure".
By now, I'm sure, you have seen lots of cards using these fun new AI ladies.  They are just so fun, so expect to see more.  My card features #6080 -Birdie Betty.  What a fun cute golfer gal!  The expressions on these ladies are absolutely the best and the glasses add so much to their character.  Gotta love them!!

I started off by stamping the images onto copic friendly paper with Memento black ink and coloring with my copic markers listed below.  I then cut the images out with the coordinating dies that are included with the set.  The sentiments are also included with this set.

This interactive card is fairly simple but adds such a fun element to the card.  I saw this on "Purple Girl Crafts" youtube tutorial called - Diamond Slider card.

I recommend using 80 lb or less cardstock for the slider card.  If you use heavier cardstock, it doesn't seem to fold as nicely and it's too bulky.  I then mounted this to the card base (which can be heavier cardstock).

I hope you try making one of these interactive cards.  They are so fun and easy to make.

Also, make sure to join in on the blog challenge for a chance to win a free stamp set of your choice.  We love to see what you create!

Have a wonderful day and keep creating!!

Copics used:  E000, E01, E11, E51, E53, E55
N0, N1, N3
R20, R24
BV00, BV01, BV04

Thursday, July 17, 2025

Gardener Gail

 Happy Thursday AI Friends!

WOW! WOW! WOW!  Have you seen the newest Art Impressions release?  OMGosh this release has got to be the best EVER!  I just LOVE the girlfriends line and this is right up that alley.  Add the papers to go with and WOW!  Bonnie and Joel knocked it out of the park with this release!
Picture a happy dance right now!!  Sorry, no video attached.  LOL!

My card for today uses #6076 - Gardener Gail.  These AI People are so fun to color and they are a great size (about 3 1/2 inches tall).  And the best part, they come with corresponding dies!  
I stamped each of the images onto copic friendly paper with Memento black ink and colored with my copic markers (colors listed below).  The bee and flowers come from the #5925 - Honey Bee stamp set and the papers are from two different paper packs - #5742 - Easter PP and #5939 - Fairy Garden PP.  
The watering can with the little flower is from the #5336 - Garden mini dies.  These mini dies make such a cute little addition to any card.  I love them as a simple accent or a charm hanging from a bow.  Adds a perfect extra little touch.

Make sure to check out yesterday's watercolor wednesday video  to see and hear all about the other sets.  Also, make sure to visit this blog daily for other inspirations.  There will be many more posts for these as well as other available sets.

Thanks for joining me today!  Hope you have a wonderful weekend and enjoy creating!

Copics used:  E000, E00, E11, E21, E23, E25
E51, E53, E55
N1, N3, BG32
 R20, R22, R24
Y11, Y13, Y15, YR65, YR68
YG41, YG61, YG63

Thursday, May 22, 2025

Girlfriends

 Happy Thursday AI Friends!

Today I have a card that I made for one of my best girlfriends.  I don't know about any of you, but the Art Impressions girlfriends stamp sets are my favorites!!!  Bonnie has done such a great job with each of the characters in these images.  I just love the fun and laughter expressed in each and every one of the girlfriends faces.  Sooooo relatable!  

The #4129 Uptown Girls stamp set actually has four girlfriends but I stamped only three.  Sometimes it's fun to adjust a stamp set to give it a different look.

I stamped the image with memento black ink onto copic friendly paper and colored with my copic markers listed below.  I originally colored the middle girlfriend with a solid yellow top but it was just too overpowering so I stamped the image onto pattern paper and fussy cut her top and glued it over the yellow one.  Toned it down and I like it much better.  Don't ever throw away an image because you don't like the way you colored a part of it.  You can always fix it by paper piecing or covering with a sentiment, etc.  Just depends what you don't like.  One time, I even went so far as to stamp, recolor and paper piece the hair.  It worked and I saved the image to use on another card and no one was the wiser (except my friends that saw me do it).  LOL!  

I stamped the sentiment, that is in the stamp set, at the top of the image panel.  Using a die cut from my stash, I matted the image onto a pattern paper frame using the #5873 Mini Birthday paper pack and then again on yellow cardstock.   I then placed that onto a blue checkered piece of pattern paper from the #5940 Journal Cover Paper Pack - Plaid.  To finish the card, I placed little die cut stars around and adhered a bow. 

Remember to review your stamp sets and see how you can change them up to give them a slightly different look.  Adds fun to your card making.  

Thanks for joining me today and I hope you enjoyed my card.  

Have a great day and keep creating!

Copics used:  E000, E00, E01, E11, E21, E23, E25
C00, C1, C3, C5, R20, R22
Y21, Y32, Y35, Y38
YG21, YG23, YG25
B0000, B000, B91, B93, B95

Thursday, April 24, 2025

Group Selfie

 Happy Thursday AI Friends!

Doesn't this image just scream girlfriend fun?  Haven't we all tried reaching our arm out as far as possible to get the perfect group selfie only to see that half of our face is missing?  LOL!  

I used the #4130 Picture Perfect stamp set for a friend's birthday card.  I know she'll get a kick out of it cuz it will bring back fun times.

I stamped the image onto copic friendly paper with Memento black ink and colored with my copic markers, listed below.   I used the middle flag die from the #5133 Flag Double Stitched die set to cut the three colorful flags peering out the side of the image.  I mounted the image on a piece of black cardstock and backed with a larger white piece to imitate a polaroid picture.  I die cut the word "Smile" and the banner die from dies I had in my stash.

That's it for me today.  Hope you enjoyed my card and thanks for joining me.

Have a great day and keep creating!

Copics used:  E000, E00, E01, E11
E30, E31, E33, E35, E50, E51, E53
N0, N1, N2, N4
B000, B41, B45
Y13, Y15, Y17, R20, R22
V12, V15
YR12, YR14, YR16, YR21, YR24

Thursday, April 3, 2025

Birthday Humor Reveal Wheel

 Happy Thursday AI Friends!

Today I have a humorous birthday card for my 70 year old friend using the #5279 Be Happy Laugh Lines set.  If you haven't checked out these Art Impressions Laugh Lines sets yet, make sure you go to the website and check them out.  Bonnie hit the mark on these.  The sayings are perfect as well as the images!  

I stamped the image on copic friendly paper with Memento black ink and colored with copic markers listed below.  I die cut the image panel with the largest #5062 Rounded Rectangle A2 Double Stitch Die.  I then used a smaller circle die from the #5064 Double Stitched Circles die set to cut out the notch for the reveal wheel.  Measure a circle die over each of the sentiments to make sure that you can read each within the circle.  Once you find the circle die that fits the sentiments, make sure that where you cut the hole on the image panel is low enough for the wheel to fit without popping out on the sides.  Place a brad in the center of the wheel and through the pattern paper border.  Pop the image panel up with foam dots, avoiding the wheel area, and place down over the pattern paper panel.  I then placed a circle frame over the reveal hole to finish it off.


I hope you enjoy my card today and that you will join in the fun with the current challenge - "Milestone Birthdays".  Play along for a chance to win a free stamp set.

Have a wonderful day and keep creating!
Copics used:  E000, E00, E11, B000
R20, R22, R24, R27
C1, C3, C5
G12, G16, G17

Thursday, March 27, 2025

UGH!

 Happy Thursday AI Friends!

A new release came out yesterday and boy, is it a good one!  Okay, let's be honest, they ALL are!!  This one included new alphabets and numbers, a new Easter stamp set and papers as well as a set of belly bands.  Make sure to check out the Art Impressions website.  Lots of fun new items!

My card today features the new #5910 Large Alphabet letters.  Have you ever purchased word dies only to wish you could adjust them by adding another letter, removing one or making up your own word?  Well, these letters are the perfect size to create your own word or spell the way you want to.  Actually, I should have put another couple of G's to emphasize the word "UGGGH".


I started out by stamping the image from the #5518 - Hot Mess Laugh Lines set onto copic friendly paper with Memento black ink.  I then colored with my copic markers listed below.  I stamped the image again on a piece of pattern paper from the #5892 - Easter S2 PP and fussy cut the chair so that I could paper piece onto the image.  I cut the image with a circle die from the #5726 - Nested Circle die set and matted onto a scallop circle die I had in my stash.  I die cut 2 of each of the letters U, G, H and the exclamation mark from yellow cardstock.  I layered each of the letters together for added dimension.  I stamped the sentiment from the #5278 - Dance It Out set and cut with a banner die I had in my stash.  I mounted the banner sentiment onto a piece of yellow cardstock and fussy cut it for a matted banner.  I then took a 5.5" square piece of pattern paper (stripe) and mounted it onto yellow cardstock.  I did the same for the top layer 4.5" square piece of pattern paper.  I then assembled the card together and staggered and overlapped the letters to add more fun to the card.

I hope you enjoyed my card today!  
Have a wonderful day and keep creating!

Copics used:  E000, E01, E11, E51, E53, E55, E57
C00, C01, C03, C05
B00, B01
Y04, Y21, YG61, YG63

Thursday, March 20, 2025

Crazy Garden Lady

 Happy Thursday AI Friends!

Today I have a fun birthday card featuring the #5000 Gotta Garden set.  A friend of mine loves to garden so this image was just perfect for her birthday card.  I definitely would not call her crazy but she is crazy about gardening.  LOL!

I stamped the image on copic friendly paper with Memento black ink and colored her with my copic markers listed below.  I just love the expressions on all of Bonnie's people stamp sets.  They just exude fun and laughter!  


I die cut the image panel with one of the #5063 Rectangle A2 Double Stitch die and then placed onto a pattern paper panel from the #5892 Easter S2 PP.  I then matted it with orange cardstock.  I die cut each of the sentiments, that also came in this stamp set, with a tag die from the #5132 Tag Stitched die set.  I partial cut the tag and then used the same die to also cut off the flag portion and leave the stitch pattern.
I used a scallop edge die from my stash to cut the narrow strips on each side and placed a long narrow strip of orange cardstock over the seams of the pattern paper and the scallop border.  Placed some enamel dots on the card to finish it off. 

I hope you enjoy my card today.
Have a wonderful day and keep creating!


Copics used:  N1, N3, N4
E000, E01, E11, E21, E23
R20, R24, G43, G46
B000, BG32, BG34
Y21, Y23, Y25, YR12, YR14

Thursday, September 12, 2024

Best Friends

 Happy Thursday AI Friends!

My card today just screams friendship.  I think all of us would agree that Friends are the Best!  I don't know what I would do without my Besties!! 

I created a fun-fold card using the #5516 Friends Forever stamp set.


I stamped the image on copic friendly paper and colored with copic markers listed below.   I made the window on the front using the #5063 Rectangle A2 Double Stitched die.  I used the inside rectangle for the frame of the image and the outside stitched portion for the window frame.  I made a square 5 1/2" card but you can make this on a A2 card base as well.  For the fold piece inside, I cut a piece of 80 lb cardstock 8 1/4" x 4 1/2" and scored at 2 3/4" and 5 1/2".   If you want to make a different size card, such as an A2 (4 1/4" wide x 5 1/2" high), the inside fold piece is computed as 1.5 times the width and scoring in thirds (2 1/8" and 4 1/4").  Adhere your image to the top fold piece only, so that it will swing into the window when opened.  See picture below.

I stamped the sentiment from the #5516 Friends Forever stamp set onto a stitched circle using the #5064 Double Stitch Circle die and the frame using the circle die from #5902 Mini Scallop Frame.  I added a few enamel dots and a bow and my card is finished.

Hope you enjoyed my card today.  Keep creating!

Copics used:  E000, E01, E02, E11, E13
E31, E33, E35, E37, E41, E43
C0, C1, C3, C5
R20, R22, R24
Y32, Y35
YR000, YR21
BG70, BG72, BG75


Thursday, September 5, 2024

Sweet Day

 Happy Thursday AI Friends!

Hurry! Hurry! Hurry! and get this SSE24A Sweet Bday stamp set from Simon Says Stamp.  This set is an exclusive for Simon Says Stamp and is only sold for a limited time so hurry to their website and get your set now. 


I stamped these images onto copic friendly paper and colored with my copic markers listed below.  I used #5873 Mini Birthday PP to paper piece the shirts on these cute ladies.  This just adds a cute pattern to their outfits.  I made a basic A2 top folding card and adhered it to a 5 1/2" x 8" (scored and folded at 6") base to create a fun standing card.  I fussy cut and popped up the donut stack on the bottom right of the card to add more fun donuts.  

Love this image!

Hope you enjoyed my card!

Keep creating!!

Copics used:  E000, E00, E01, E11
E21, E23, E25, E33, E35, E51, E53
C0, C1, C2, C3
YR20, YR21
R20, R22, R24
BV01, BV02, BV04
B91, B93, B95

Thursday, May 30, 2024

Flaunt It

 Happy Thursday AI Friends!

My card today is based on the current challenge at Art Impressions "All That Glitters".  I hope you decide to play along and enter to win a free stamp set.  See the "Bi-Weekly Challenge" tab.  

When I thought glitter, the #4756 Flaunt It stamp set was the first set to come to mind.  I had sooo much fun "glittering" up these ladies.  But first things first, I stamped the image onto copic friendly paper and colored the gals with copic markers (see list below).  When I finished coloring up the image, I wasn't excited about my coloring of the gal on the left, so I decided to paper piece her dress over my coloring.  I stamped her again onto pattern paper from the #5742 Easter PP and fussy cut the dress out.  Then I glued the dress into place.  Much better!  This is a great way to save your image if you don't like the way you originally colored it.  Beats re-coloring the whole image.  

I lightly placed glue on the boa and then sprinkled with glitter.  Tapped off the excess and performed that step again where needed.  For the glasses and the crown, I used stardust stickles.  I also used an aqua shimmer pen on the shoes and bracelet, but it doesn't show up very well in the picture.  

The saying, from the Flaunt It set, is perfect for my girlfriends and I - we just find ourselves so funny.  I'm not so sure that our husbands find us as funny as we think we are, but we sure get a kick out of ourselves.  LOL!  The bow is from the #5318 MB Envelope dies and the glasses are from my stash.

Thanks for joining me today and I hope you have a great day!  

Remember to enter the challenge to win a free stamp set!

Copics used:  E000, E00, E01, E02, E11
E21, E23, E53, Y21
T0, T2, T4, T6
R11, R12, R14, R20
YG41, YG45
V12, V15, V17


Friday, March 11, 2022

Girlfriends

 This week's challenge at Art Impressions is asking to feature women.  How easy is that with all of the fantastic Girlfriends stamp sets by Art Impressions.  I used the "Comfy on the Couch" set which actually has 4 girlfriends sitting on the couch.  I eliminated one (by cutting her out and splicing the image together) so that it would reflect my friendship with two of my best buddies.  This actually went together pretty easily.  This was so perfect for us.  The saying is from the "Dance it out Laugh Lines" set.  Great saying!


I paper pieced the couch and colored the girlfriends with copic markers.  Created the rug by cutting the patterned paper with the edge die and rounding it off to look like a rug.  Always trying to be creative but not really sure how well it turns out.  ๐Ÿ˜  Guess it doesn't really matter as long as I have fun doing it.

Hope you enjoy my card and it gives you a little inspiration to try something different with your stamps and dies.

Have a great weekend.