Showing posts with label Scene. Show all posts

Thursday, August 14, 2025

Vacation Vibes

Happy Thursday AI Friends!

Wondering if you've seen the five new paper packs from Art Impressions yet.  If not, make sure to visit the Art Impressions website.  These paper packs were designed to go with the five new fun AI People stamps sets.  However, I wanted to show you how versatile they are and how you can use them with some other stamp sets.  They make such fun backgrounds.  All you need to do is add some images to them and your card is complete.  I used the #6100 - Lounge PP, #5187 Happy Trails stamp set for the couple on the beach, added a few accessories and the card is full of fun and relaxation.  
Total Vacation Vibes!

I began by stamping the images with Memento black ink onto copic friendly paper and coloring them with my copic markers listed below.  The couple are from the #5187 - Happy Trails set and the accessories (beach ball, hat and cooler) are from the #5509 - Beach Accessories and the #5510 - Sports Accessories.  The sun and the cloud are from my stash.


The accessories come with corresponding dies but the beach chair couple, I had to fussy cut. 
I used the largest #5062 - Rounded Rectangle A2 Double Stitch die to cut the background and then placed a layer of foam underneath to pop it up on the card base.  I also popped up the sentiment cloud, the couple and the accessories for added dimension.

Hope you look through your stamp sets and find other fun images to use with these papers.  Such a great way to add a scene as your background.

Thanks for joining me today.  Have a wonderful day and keep creating!
Copics used:  N0, N1, N2
E000, E01, E11, E21, E23 E25, E51, E53, E55, E57
R20, Y32, G40, G24
B0000, B91, B93, B95

Thursday, August 7, 2025

Gnome Frame

Happy Thursday AI Friends!

Today I have a cute little frame that fits right in with the current blog challenge called "Stitches and Scallops".  I love this little #5902 - Mini Scallop Frame set.  It makes the cutest little display card for a desk, mantel, shelf or anywhere for that matter.  This one with the gnomes brings a smile to my face.
        

I began by stamping the images onto copic friendly paper with Memento black ink and coloring with my copic markers listed below.  The gnomes (5785 - Gnomes set) and the bees (5935 - Fairytale Houses) were cut using their corresponding dies that are included in these sets.  
The scene was stamped onto a 3 x 2 1/2" piece of copic friendly paper.  The tree stump is from the 2025 freebies part 1.  If you don't have that freebie, you can use the stump from the KH5951 - Foxes set and draw in the door and window.  I colored, free hand, the walkway and the grass.  Don't look too close because they are pretty rough.  😞  The leaves were stamped with Memento black ink using the 5989 - Dwelling Foliage set and colored with my copic markers.

I die cut the frame from a piece of striped paper from the 6012 - Basic Yellow PP using the #5902 - Mini Scallop Frame die.  I also die cut the oval opening using the #5727 Nested Oval die.  I then die cut a stitched oval frame to place on the outside of the oval opening using the #5065 - Oval Double Stitch die with a slightly larger nested oval from the #5727 - Nested Oval dies.

I popped the gnomes up on foam tape and adhered one to the top of the stump and the other to the outer side of the stitched oval frame.  I adhered one bee directly to the image and the other to the outer frame.  Lastly, I cut the sentiment banner from the #5588 - Journal Oval Frame set and stamped the sentiment from the #5785 Gnomes set onto the center of the banner.  

Oops, almost forgot the easel.  Make sure to die cut one from the #5902 - Mini Scallop Frame die and adhere to the backside of the scallop frame so that it stands nicely.


That's it for me today.  Hope you play along and enter the challenge "Stitches and Scallops" to win a free stamp set of your choice.  It's easy and so fun (especially if you win). 😁

Have a great weekend and keep creating but make sure to share because we love inspiration!
Copics used:  E01, E11, E21, E23, E25
W0, W1, W3, W5
Y15, Y17
B32, B34
G40, G43

Thursday, July 10, 2025

Golden Mermaid

 Happy Thursday AI Friends!

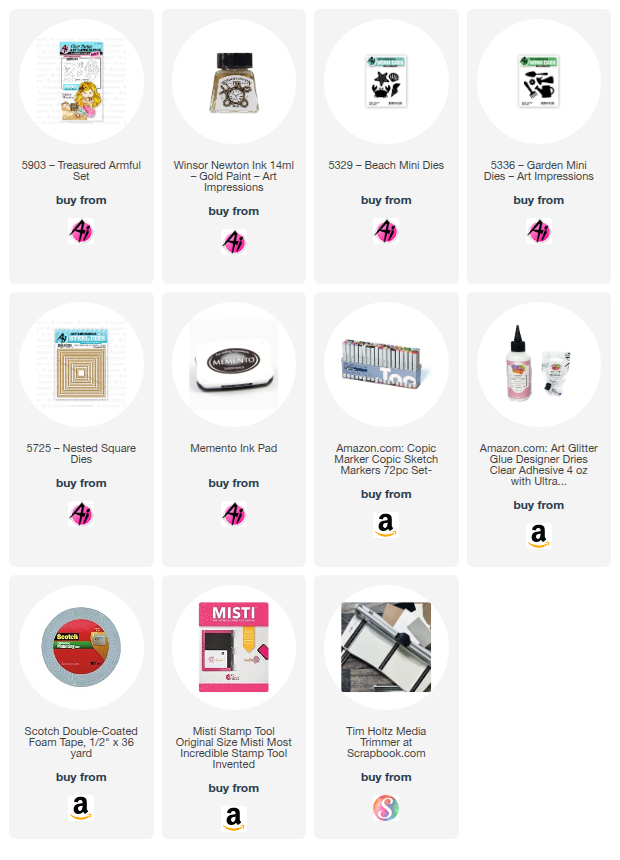
My card today was inspired by the current blog challenge "Spritz, Splatter and Paint!"  A perfect way to showcase the new Winsor Newton Ink 14ml - Gold Paint sold now on the Art Impressions website.  Although the challenge does not stipulate that you have to use gold, you can use any spritz, splatter or any color paint.  I chose to use the new product, since it was new to me too.

This gold paint is awesome and adds such glimmer and shimmer to your project.  I played with it a little bit to see how I wanted to use it.  I loved the look with stencils and a makeup sponge, smooshed onto the paper and spritzed or splattered.  For my card, I chose to paint with it, stamp it and also used it in a mister (mix with a touch of water in a mister).  


I stamped the #5903 - Treasured Armful Mermaid images onto copic friendly paper with Memento black ink and colored with my copic markers listed below.  I then die cut each of the images using the coordinating dies that come with the stamp set.  I'm using a background that I made awhile back but thought it would be perfect for this card.   Using the backside of photo paper, I believe I used Ranger alcohol inks - Mermaid and Glacier - but any blues will work.  I also used a bubble frame die that I had in my stash.    


I painted the treasure chest with the Winsor Newton gold paint as well as the middle of the flower in her hair.  When you zoom in, you can really see the result.  I painted some gold onto the sentiment stamp and stamped it onto white cardstock.   But, I liked the use of the gold paint in a mister the best.  This produced the best shimmer and still left the color underneath showing through.  See the sand in the picture above and the mermaid tail and hair in the picture below.  One or two mists will do the trick, but it's hard to stop.  I actually sprayed too much the first time but was able to wipe some of it off.  Wait until it slightly dries first, then wipe a paper towel lightly over it.    


After all the images were colored, painted and sprayed, I assembled the card.  This little mermaid actually swings back and forth as if swimming.  
Punch a hole in the background behind where her head will be, large enough for a foam pop dot.  Glue a penny, button or paper disc to one side of the pop dot.  Place the pop dot through the hole from the backside and adhere the mermaid (approx. forehead) to the pop dot poking through.  She should rock nicely at this point.  Place a thicker layer of foam tape on the backside of the background avoiding the penny, button, or disc.  Adhere onto your card base.  Test to make sure that she moves freely.  Pop up the frame so it is slightly higher than the inner square.  This will help stop her movement so she doesn't flip all the way around.

I hope you join in our blog challenge for a chance to win a free stamp set.  We love to see what you create!
Have a wonderful day and keep crafting!

Copics used:  E000, E01, E11, R20
E30, E31, E33, E35, E37, YR31
RV63, RV66; V05
YG09, BG05
Thursday, July 3, 2025

Hello 4th

 Happy Independence Day AI Friends!

WOW!  Have you seen the newest release of papers at Art Impressions?  Holy cow!  I couldn't stand it, I had to put a card together using the new #6090 - Patriotic paper pack.  Although a lot of the papers are 4th of July themed, there are many that can be used for any occasion.  The patterns are incredible and the colors are vibrant and fantastic.  Make sure to check them out!  I can't wait to design with the rest of the pack!!!

I started out by stamping the images from the #5452 - Swing Window set onto copic friendly paper and coloring them with my copic markers, listed below.  The little puppy has a coordinating die that comes with the set so you can pop him up, if you choose.  


I used the #5408 - Shadowbox Window Die to display the image and then I created an interactive venetian blind which was inspired by a Technique Tuesday die tutorial that I found on YouTube.

To create without the die:  Cut a piece of pattern paper 2 3/4" by 4 7/8".  Score every 3/4" along the longest side.  Before folding, punch a small hole, approx. 1/8" in, between each score line on both sides for the strings.  Try to center punch each of the holes, but it does not have to be perfect.  Fold each of the score lines into peaks and valleys.  The valley end should be at the top, this is the side that adheres to the base.  Thread a string up both sides leaving the loose ends at the top.  Thread a bead or knot the loose ends for the string pulls.  Adhere the valley side of the blinds down to the base by placing glue between the string holes.  Make sure to place glue only between the holes or the mechanism won't work. 
 
Valance:  Cut the valance out of another piece of pattern paper and partial die cut with the #6047 - Scalloped Square third largest die (should measure 3 1/4" wide by 3/4" tall).  Make a slight snip on either side at the bottom scallop to hold the string when pulled up.  Pop the valance up with foam tape and adhere just above the top of the blinds.
The bow and the flag heart are fussy cut from the pattern papers of the same paper pack.  Makes great accents!  The Hello die cut is part of the Shadowbox Window die set.

Thanks for joining me today.  Hope you have a wonderful and safe 4th of July weekend.
Keep creating!!

Copics used:  E000, E01, E11, E21, E23, E25, E50, E51, E53, E55
Y13, R20, R22, R24, R27
G20, G21, G24, G28
B0000, B000, B00, B32, B37

Thursday, February 27, 2025

Easter Fun Fold

 Happy Thursday AI Friends!

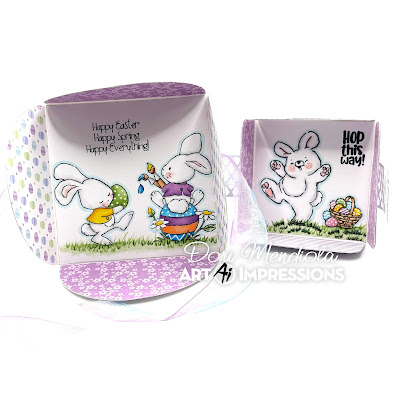
Today I have a couple Fun Fold Easter cards using the #5274 Easter Bunnies, the #5870 Peeking Bunny, and the #5504 Happy Spring sets.  These Easter sets have the cutest little bunnies.  OMGosh sooooo cute!!  Add these images to this fun fold style card and you'll find yourself addicted.  I could have created all night.  I will definitely be making more.

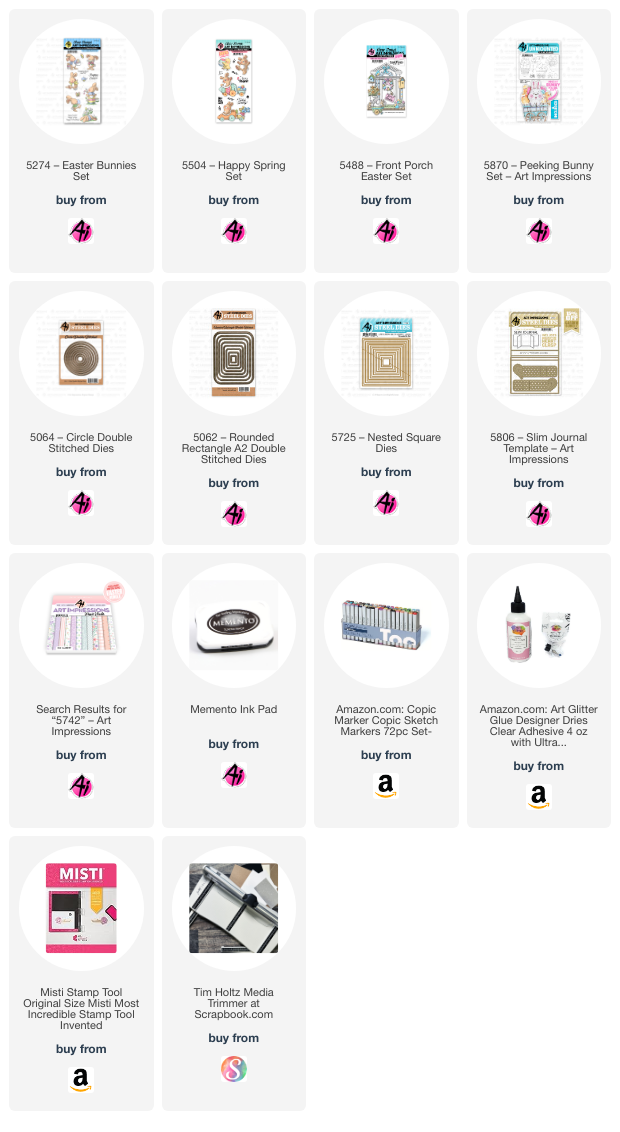
To create these fun folds, I choose the largest circle from the #5064 Double Stitch circle die set for the card on the left and the 4th largest #5062 Rounded Rectangle A2 Double Stitch die for the smaller card.  The following instructions will be for the circle card.  The rectangle card is basically made the same just a different size and shape.  
I cut four circles from white lightweight (80 lb. or less) cardstock and scored each in half.  I then formed the fun fold by overlapping the circles as shown below (the right half over the previous circle right half).  Continue overlapping the circles until all are together.  Make sure to gather them together and square them up tightly.  Place a dab of glue on the back side where they overlap.  Then flip to the front side and dab glue under these overlaps.  Now your fun fold is formed.   


Cut four circles from pattern paper.  I cut two with the largest circle and two with the next size circle.      Cut each of these four circles in half and cut just a tad off the straight side of the larger circles.  The smaller circles are for the front and will recreate a 2-layer look (see below).  Glue the smaller circles to the front (or top) folds, centering up to leave a nice white border.  Glue the larger circles to the inside folds, leaving no border.  
I stamped my one-layer scene onto copic friendly paper with Memento black ink and colored with my copic markers listed below.  I then cut the scene to fit inside the fun fold card (3 1/2 x 3 1/2 inches). Adhere this image to the inside of the card.  Place a ribbon or belly band around the back side and adhere down to the back.  Wrap around and tie or clasp into place.  I added a basket with the bunny bottom for decoration.  Lastly, I glued a 3 1/2 x 3 1/2 top fold card to the back for your sentiment and also to finish off the back side of the card so that the ribbon or belly band will be covered.  This also adds as a nice stand to display your card.

Hope you enjoyed my cards today and I especially hope you'll give this one a try.  Trust me, you will want to create more with different shapes and sizes.  It's addictive! 

Happy creating!!

Copics used:  N0, N1, E21, E23, R20
YR01, YR02, Y13, Y15, Y17
V12, V15, G40, G43, G46
B000, B00, B12, B14
R81, R83, E51, E53, E55

Thursday, October 8, 2020

Scenic Route

 Today's post is a card I made for my daughter using Art Impressions stamp sets Enjoy the Ride and Cottage and Die set (unfortunately, this last one is retired).  She just bought a house and we joke with her that we are going to ride our bikes over to visit (often πŸ˜‚).  I always wanted a tandem bike, but my husband thought I wouldn't peddle, so this image is absolutely perfect.  😁


The Art Impressions challenge this week is "Scenic Route".  I made this a fold-out card so that you could see the whole scene when opened up.  I based the card around the bike image, which I colored with copic markers, and thought it would make for a great "scene" card for the challenge.  I paper pieced the cottage which was very simple to do since Art Impressions makes their images so easy to fussy cut.  I added a few trees, clouds, grass and road to carry out the scene.

Hope you like my card and it inspires you to have fun with your stamps and dies.  

Have a great day!