Showing posts with label beach. Show all posts

Thursday, August 14, 2025

Vacation Vibes

Happy Thursday AI Friends!

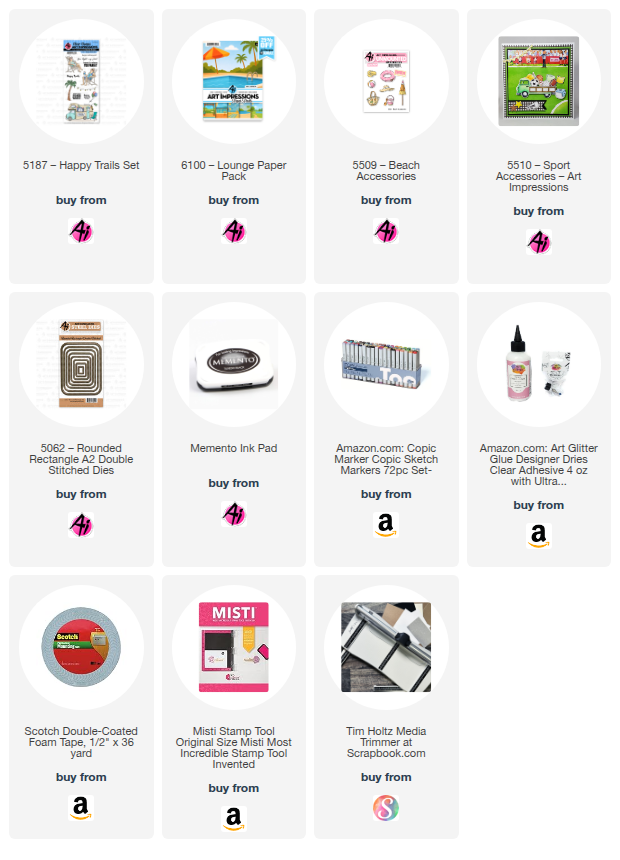
Wondering if you've seen the five new paper packs from Art Impressions yet.  If not, make sure to visit the Art Impressions website.  These paper packs were designed to go with the five new fun AI People stamps sets.  However, I wanted to show you how versatile they are and how you can use them with some other stamp sets.  They make such fun backgrounds.  All you need to do is add some images to them and your card is complete.  I used the #6100 - Lounge PP, #5187 Happy Trails stamp set for the couple on the beach, added a few accessories and the card is full of fun and relaxation.  
Total Vacation Vibes!

I began by stamping the images with Memento black ink onto copic friendly paper and coloring them with my copic markers listed below.  The couple are from the #5187 - Happy Trails set and the accessories (beach ball, hat and cooler) are from the #5509 - Beach Accessories and the #5510 - Sports Accessories.  The sun and the cloud are from my stash.


The accessories come with corresponding dies but the beach chair couple, I had to fussy cut. 
I used the largest #5062 - Rounded Rectangle A2 Double Stitch die to cut the background and then placed a layer of foam underneath to pop it up on the card base.  I also popped up the sentiment cloud, the couple and the accessories for added dimension.

Hope you look through your stamp sets and find other fun images to use with these papers.  Such a great way to add a scene as your background.

Thanks for joining me today.  Have a wonderful day and keep creating!
Copics used:  N0, N1, N2
E000, E01, E11, E21, E23 E25, E51, E53, E55, E57
R20, Y32, G40, G24
B0000, B91, B93, B95

Thursday, July 10, 2025

Golden Mermaid

 Happy Thursday AI Friends!

My card today was inspired by the current blog challenge "Spritz, Splatter and Paint!"  A perfect way to showcase the new Winsor Newton Ink 14ml - Gold Paint sold now on the Art Impressions website.  Although the challenge does not stipulate that you have to use gold, you can use any spritz, splatter or any color paint.  I chose to use the new product, since it was new to me too.

This gold paint is awesome and adds such glimmer and shimmer to your project.  I played with it a little bit to see how I wanted to use it.  I loved the look with stencils and a makeup sponge, smooshed onto the paper and spritzed or splattered.  For my card, I chose to paint with it, stamp it and also used it in a mister (mix with a touch of water in a mister).  


I stamped the #5903 - Treasured Armful Mermaid images onto copic friendly paper with Memento black ink and colored with my copic markers listed below.  I then die cut each of the images using the coordinating dies that come with the stamp set.  I'm using a background that I made awhile back but thought it would be perfect for this card.   Using the backside of photo paper, I believe I used Ranger alcohol inks - Mermaid and Glacier - but any blues will work.  I also used a bubble frame die that I had in my stash.    


I painted the treasure chest with the Winsor Newton gold paint as well as the middle of the flower in her hair.  When you zoom in, you can really see the result.  I painted some gold onto the sentiment stamp and stamped it onto white cardstock.   But, I liked the use of the gold paint in a mister the best.  This produced the best shimmer and still left the color underneath showing through.  See the sand in the picture above and the mermaid tail and hair in the picture below.  One or two mists will do the trick, but it's hard to stop.  I actually sprayed too much the first time but was able to wipe some of it off.  Wait until it slightly dries first, then wipe a paper towel lightly over it.    


After all the images were colored, painted and sprayed, I assembled the card.  This little mermaid actually swings back and forth as if swimming.  
Punch a hole in the background behind where her head will be, large enough for a foam pop dot.  Glue a penny, button or paper disc to one side of the pop dot.  Place the pop dot through the hole from the backside and adhere the mermaid (approx. forehead) to the pop dot poking through.  She should rock nicely at this point.  Place a thicker layer of foam tape on the backside of the background avoiding the penny, button, or disc.  Adhere onto your card base.  Test to make sure that she moves freely.  Pop up the frame so it is slightly higher than the inner square.  This will help stop her movement so she doesn't flip all the way around.

I hope you join in our blog challenge for a chance to win a free stamp set.  We love to see what you create!
Have a wonderful day and keep crafting!

Copics used:  E000, E01, E11, R20
E30, E31, E33, E35, E37, YR31
RV63, RV66; V05
YG09, BG05

Thursday, May 9, 2024

Fun Gulls

 Happy Thursday Friends

I have a fun card today that fits with the Art Impressions May Guest Designer challenge - "Anchors Away".  See the tab at the top of the Art Impressions Blog for details.  I hope you will join in and play.  It's very easy, fun and you could win a free stamp set plus be a guest designer for a month.  


First I started with the background by ink blending distress oxide twisted citron and broken china onto a 4 x 5 1/4 piece of Strathmore Bristol Smooth cardstock.  I misted with water to create the water spots and then partial die cut with a wave background die.  I used a piece of kraft cardstock for the beach and die cut with a hillside die.  I spotted with copic markers to mimic sand and the background is complete. 

Next, I stamped several images from the #5399 Gull-Friends set onto cryogen white cardstock  and colored with copic markers (see below for colors).  I die cut the images out with the corresponding dies that come in the set.  The tree stump is the log, turned sideways, from the #5055 WC Sitting Places set.  I stamped, colored and fussy cut two of the logs.  Trimmed a bit off the top of one of them and placed it at a slight diagonal just behind the other one.  I used foam tape to give it dimension and tied them together with twine.   The anchor and the flying seagulls are from the #5325 Sail Mini dies.  The sentiment is from the #5399 Gull-Friends set stamped onto a 1" circle die cut from the #5064 Double Stitched Circle dies.

Thanks for stopping by and I hope you will join in on the challenges going on this week.

Have a great day!

Copics markers used: 
C00, C1, C3, 
E53, E55, E57, E59
R20, R22, 
Y13, Y15, Y17, 
B12, B14, B16
YR12, YR04, YR07, YR21, YR24
YG21, YG23, YG25

Sunday, May 16, 2021

Ride the Wave

 The Art Impressions challenge for this week is "Under the Sea".  I love the new critter cubbie release sets (Under the Sea and The Hen House) but I haven't purchased them yet.  So, for the challenge, I used the 2020 Art Impressions freebie stamps.  Love love love the puffer fish and the crab.  Well, actually, I love them all but these two are my favorites.  I also used the Hero Arts wave background die to make the ocean scene.  The sea creatures tuck right into the die openings.


  I colored the images with copic markers and then fussy cut them out.  Art Impressions make their images so easy to fussy cut and when you pop them up with foam tape, they just come alive.  

  Hope we all get to go ride the waves this summer.  Sooooo looking forward to some sun and fun!


Thursday, August 20, 2020

Summer Fun

 Today I'm featuring the Art Impressions Beach Booty stamp set.  Unfortunately, this stamp set is discontinued, but I use it all the time.  It just screams summer fun!!  Her expression is the best and her booty even wobbles.  Who could ask for more?  ๐Ÿ˜‚  


Hope you are enjoying your summer thus far!  There's still a little bit left so go have fun and make sure to spend some time crafting!