Showing posts with label Birthday. Show all posts

Thursday, February 26, 2026

Nurse's Prescription

Happy Thursday AI Friends!

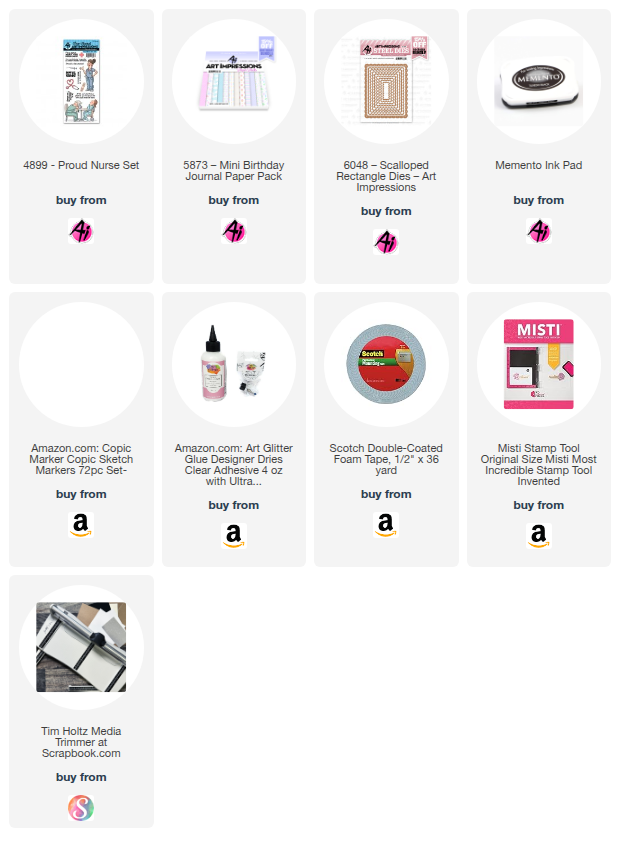
Today I have a fun card using the #4899 - Proud Nurse stamp set.  A friend of mine is a nurse and I knew she would appreciate this birthday card and the funny sentiment included in this stamp set.  She may use that line for some of her patients.  LOL!


I made this a fun fold card using a magnet for the closure.  I hid it under the paper layers so you only hear the snap when it closes.  What is it about that sound that makes it so fun to open and close the card?  πŸ˜‚

To make the card base, I cut a piece of 5 1/2" x 7 1/4" heavy cardstock.  I scored it along the 7 1/4" side at 3" and 6".  This will make it an A2 card size.  Fold and burnish each score line in opposite directions.  Create your mat panels for each of the sections.   I used the #5873 - Mini Birthday PP for the pattern paper panels.    

For the front panel, I stamped the image onto copic friendly paper with Memento black ink and colored with my copic markers listed below.  I then die cut the panel using the #6048 - Scalloped Rectangle dies as well as the larger pink panel.  The blue panel in the middle is cut to fit between the two scallop rectangles.   I adhered the matted image panel to the folded right side only of the card.  The left side of the card will close under the image panel.


The sentiment on the left side of the card is from my stash.   I figured that went perfectly with the front sentiment, plus I got to include myself in on the wine splurge.  LOL!

Thanks for joining me today!  Have a great day and keep creating!

Copics used:  E000, E00, E01, E11, E21, E23
C00, C1, C3,  Y12
R20, R81, R83, R85
B000, B12, B14

Thursday, February 19, 2026

Birthday Wishes

 Happy Thursday AI Friends!

My card today was inspired by the current blog challenge called "It's in the Mail".   I took this challenge literally and combed through all of my stamp sets to locate the perfect mailbox to go with this lady from the #5114 - Never Too Old Laugh Lines.  I found the mailbox in the #5930 - Santa's Workshop stamp set.  

I needed to make a birthday card for my sister and I just think this lady is hilarious.  My sister didn't find her nearly as funny until I told her the lady was representing me mailing her card not her receiving it.  πŸ˜‚
Maybe I should add a wink wink here too.  LOL! 


Anyway, back to the card.  I stamped the images onto copic friendly paper with Memento black ink and colored with my copic markers listed below.  I then cut each out with the corresponding dies.  
I decided to make it a fun fold easel card by cutting a 4 1/4" x 9 3/4" piece of cardstock.  I scored it along the long side at 1 1/4, flipped the cardstock over and scored it at 5 1/2" keeping the other score line to your left.  Fold and burnish the score lines in opposite directions.   
I cut orange cardstock pieces to fit each of the scored sections and also adhered a piece of pattern paper to fit nicely on each of the orange mats.
Die cut two ovals with the #5065 - Oval Double Stitch dies.  One in pattern paper and the other in textured white.  For the base oval, I used the #5727 - Nested Oval dies.  Glue those three ovals together and adhere the top edge only to the 1 1/4" folded edge.  When opened, the oval piece will stand up on the bottom layer.  I added the colored images to this panel using foam dots for dimension.
To finish, I stamped the sentiment from the #5735 - Birthday Sentiments and partial die cut using the #5062 Rounded Rectangle A2 Double Stitch die.  I added an oval piece of white cardstock to the inside of the card (behind the image panel) for my birthday message and a few purple embellishments to the corners.

Well, that's my card for today.  Thanks for joining me!  
Hope you have a wonderful day and keep creating!

Copics used:  E000, E00, E11, R20, R24
C00, C1, C3, C5
V12, V15, V17
BG10, BG23, BG53
G40, G43, G46
Y11, Y13, Y32, Y35, Y38

Thursday, January 1, 2026

No. 1 Book and Gnome Bookmark

 Happy New Year AI Friends!

I hope you had a wonderful holiday and are ready for the New Year!
 Can't wait to see all the fabulous creations from Bonnie and Kim.  I have no doubt that they will have lots of fun products for us again this year!

I'm starting off the New Year using #6114 - Box Village Template dies from the Holiday Lane series.  
I slightly changed the book cover to make it look like a number 1 for my granddaughter's first birthday.  Hope it's clear for you to see - made with the #5940 Journal Cover Paper Pack - Purple Plaid paper.  

I used #5873 - Mini Birthday Journal Paper pack for the inside of the book.  The inside contains pictures, pockets, notes and details from her first year and as much as I would love to show her off, my daughter asked that I didn't, so, unfortunately I don't have many pages to show.  However, my main purpose in showing this book was to emphasize how you can make slight changes to extend the die sets to fit your occasion.  Let your mind go!  Mine sometimes goes in odd directions but it's fun to see what can be created.  LOL!   


  Her birthday was S'mores themed so I created a S'mores with a square die from the #5725 Nested square dies set and the #5407 Birthday Cake GCH frosting die.  The graham cracker part was cut in rectangle shape and rounded the corners with a corner punch.  I inked the edges, stamped a cute little face on it and added a bow.  The sentiment tag is from the #6121 Storybook template.

Gnome Bookmark:  Another slight alteration of dies - here's a bookmark I made into a Gnome using the #5931 Santa Puppet die set.  The only real change that I made was that I added an additional beard layer by partial die cutting to make it slightly smaller so that it fit on top of the bottom one.  Then the nose fit nicely in between the top beard layer and the rim of his cap.  I omitted the brows, mustache and eyes.  Since he isn't a Santa, I also omitted the belt and fur parts of his outfit.  I die cut his outfit using the #5832 Gnome PP.  This paper choice made him look like he was wearing PJs so I added a cookie and coffee mug (from my stash) in his hands.  I placed him onto a bookmark made with the #5223 - Bookmark die.  He actually resembled me after Christmas.  I was a complete couch potato with my PJs on and my coffee mug in hand.  Life is good! 


Welcome to 2026 and another fun year with Art Impressions. 

Thanks for joining me today!  
Have a great day and keep creating!


Thursday, August 28, 2025

Loungin' Linda Bday

 Happy Thursday AI Friends!

I know I've said it before, but I'm going to say it again.  These new AI ladies are a HOOT!
I made this card for a friend of mine and, yes, she will always be older than me so I'm going to rub it in when I can.  😁  But, I can say with sadness, she doesn't look older! πŸ˜›

I stamped the images on copic friendly paper with Memento black ink and colored with my copic markers listed below.   I used the 6077 - Loungin' Linda stamp set along with the 5509 - Beach Accessories stamp set (handbag).

I also used the 5873 Mini Birthday PP and the 5132 - Tag Stitched dies.  The sentiment, balloons and scallop stitch edges are from my stash.

Hope you have a wonderful day!  Keep creating!

Copics used:  E000, E00, E01, E11
C0, C1, C3, C5, C7
R20, R22, R24
Y13, Y15, V20, V22, V25
BG10, B0000, B000, B12, B14

Thursday, July 24, 2025

Hedgehog Tuck Flap Card

 Happy Thursday AI Friends!

We have a new blog challenge currently going on called "Let Them Eat Cake".  Any card, project with cakes or cupcakes, etc.   I decided to make a cute little Hedgehog Tuck Flap card using the #5112 - Hedgehogs set with the cake from the #4980 - Birthday Circlet MTF and the presents from the #5491 - Front Porch Party set as accents. 

I stamped all of the images onto copic friendly paper with Memento black ink and colored with my copic markers listed below.  The hedgehog was stamped onto a 3.5 inch square.  The other images are cut using the dies, so can be stamped onto any size paper.  

I die cut the cake and balloons with the corresponding die (#4980 Birthday Circlet) and then fussy cut the portion that wasn't cut out with the die.  The presents (#5491 - Front Porch Party) were cut with the dies included in that set.  I mounted each of those onto a white circle die cut and then layered onto a blue circle die cut.  I cut two corner bookmarks using the new #6042 - Corner Bookmark dies.  I assembled the bookmarks and adhered the circle die cuts onto each of the fronts of the bookmarks. 

For the card base and fold, I cut a top folding A2 card size 4.25 by 8.25 inches and scored at 5.5 inches.  This will leave a 2.75 inch flap for the front.  Using the #6011 - Basic Teal PP, cut two pieces (front -
2.5 x 4 inch and the inside - 5.25 x 4) to be layered onto blue cardstock.  Place the corner bookmarks over the bottom edges of the inside layer and adhere this layer to the inside of the card base.  This will glue the bookmarks to the inside of the card and leave the back of the card white.  Mount the hedgehog image onto blue cardstock.  Place glue onto the backside of the top half only and adhere to the front flap of the card base.  Add the sentiment from the Hedgehog set and die cut with the #6046 - Scallop Oval dies with a blue layer cut from the #5065 - Nested Oval dies.

Create an easel with the #5902 - Mini Scallop Frame die and glue to the back of the card base.  Tuck the hedgehog image piece inside the bookmark edges and you have a Tuck Flap card that stands on display, thanks to the easel.

Hope you join us in this "Let Them Eat Cake" challenge for a chance to win a free stamp set of your choice.  We LOVE to see your creations!

Hope you have a wonderful weekend and keep creating!

Copics used:  E01, E02, E11, E21, E23, E25
R20, N0, N1, N2
B000, B00, B01, B02
Y13, Y15, Y17, Y21
YG21, YG23, YG25 

Thursday, April 24, 2025

Group Selfie

 Happy Thursday AI Friends!

Doesn't this image just scream girlfriend fun?  Haven't we all tried reaching our arm out as far as possible to get the perfect group selfie only to see that half of our face is missing?  LOL!  

I used the #4130 Picture Perfect stamp set for a friend's birthday card.  I know she'll get a kick out of it cuz it will bring back fun times.

I stamped the image onto copic friendly paper with Memento black ink and colored with my copic markers, listed below.   I used the middle flag die from the #5133 Flag Double Stitched die set to cut the three colorful flags peering out the side of the image.  I mounted the image on a piece of black cardstock and backed with a larger white piece to imitate a polaroid picture.  I die cut the word "Smile" and the banner die from dies I had in my stash.

That's it for me today.  Hope you enjoyed my card and thanks for joining me.

Have a great day and keep creating!

Copics used:  E000, E00, E01, E11
E30, E31, E33, E35, E50, E51, E53
N0, N1, N2, N4
B000, B41, B45
Y13, Y15, Y17, R20, R22
V12, V15
YR12, YR14, YR16, YR21, YR24

Thursday, April 3, 2025

Birthday Humor Reveal Wheel

 Happy Thursday AI Friends!

Today I have a humorous birthday card for my 70 year old friend using the #5279 Be Happy Laugh Lines set.  If you haven't checked out these Art Impressions Laugh Lines sets yet, make sure you go to the website and check them out.  Bonnie hit the mark on these.  The sayings are perfect as well as the images!  

I stamped the image on copic friendly paper with Memento black ink and colored with copic markers listed below.  I die cut the image panel with the largest #5062 Rounded Rectangle A2 Double Stitch Die.  I then used a smaller circle die from the #5064 Double Stitched Circles die set to cut out the notch for the reveal wheel.  Measure a circle die over each of the sentiments to make sure that you can read each within the circle.  Once you find the circle die that fits the sentiments, make sure that where you cut the hole on the image panel is low enough for the wheel to fit without popping out on the sides.  Place a brad in the center of the wheel and through the pattern paper border.  Pop the image panel up with foam dots, avoiding the wheel area, and place down over the pattern paper panel.  I then placed a circle frame over the reveal hole to finish it off.


I hope you enjoy my card today and that you will join in the fun with the current challenge - "Milestone Birthdays".  Play along for a chance to win a free stamp set.

Have a wonderful day and keep creating!
Copics used:  E000, E00, E11, B000
R20, R22, R24, R27
C1, C3, C5
G12, G16, G17

Thursday, March 27, 2025

UGH!

 Happy Thursday AI Friends!

A new release came out yesterday and boy, is it a good one!  Okay, let's be honest, they ALL are!!  This one included new alphabets and numbers, a new Easter stamp set and papers as well as a set of belly bands.  Make sure to check out the Art Impressions website.  Lots of fun new items!

My card today features the new #5910 Large Alphabet letters.  Have you ever purchased word dies only to wish you could adjust them by adding another letter, removing one or making up your own word?  Well, these letters are the perfect size to create your own word or spell the way you want to.  Actually, I should have put another couple of G's to emphasize the word "UGGGH".


I started out by stamping the image from the #5518 - Hot Mess Laugh Lines set onto copic friendly paper with Memento black ink.  I then colored with my copic markers listed below.  I stamped the image again on a piece of pattern paper from the #5892 - Easter S2 PP and fussy cut the chair so that I could paper piece onto the image.  I cut the image with a circle die from the #5726 - Nested Circle die set and matted onto a scallop circle die I had in my stash.  I die cut 2 of each of the letters U, G, H and the exclamation mark from yellow cardstock.  I layered each of the letters together for added dimension.  I stamped the sentiment from the #5278 - Dance It Out set and cut with a banner die I had in my stash.  I mounted the banner sentiment onto a piece of yellow cardstock and fussy cut it for a matted banner.  I then took a 5.5" square piece of pattern paper (stripe) and mounted it onto yellow cardstock.  I did the same for the top layer 4.5" square piece of pattern paper.  I then assembled the card together and staggered and overlapped the letters to add more fun to the card.

I hope you enjoyed my card today!  
Have a wonderful day and keep creating!

Copics used:  E000, E01, E11, E51, E53, E55, E57
C00, C01, C03, C05
B00, B01
Y04, Y21, YG61, YG63

Thursday, March 20, 2025

Crazy Garden Lady

 Happy Thursday AI Friends!

Today I have a fun birthday card featuring the #5000 Gotta Garden set.  A friend of mine loves to garden so this image was just perfect for her birthday card.  I definitely would not call her crazy but she is crazy about gardening.  LOL!

I stamped the image on copic friendly paper with Memento black ink and colored her with my copic markers listed below.  I just love the expressions on all of Bonnie's people stamp sets.  They just exude fun and laughter!  


I die cut the image panel with one of the #5063 Rectangle A2 Double Stitch die and then placed onto a pattern paper panel from the #5892 Easter S2 PP.  I then matted it with orange cardstock.  I die cut each of the sentiments, that also came in this stamp set, with a tag die from the #5132 Tag Stitched die set.  I partial cut the tag and then used the same die to also cut off the flag portion and leave the stitch pattern.
I used a scallop edge die from my stash to cut the narrow strips on each side and placed a long narrow strip of orange cardstock over the seams of the pattern paper and the scallop border.  Placed some enamel dots on the card to finish it off. 

I hope you enjoy my card today.
Have a wonderful day and keep creating!


Copics used:  N1, N3, N4
E000, E01, E11, E21, E23
R20, R24, G43, G46
B000, BG32, BG34
Y21, Y23, Y25, YR12, YR14

Thursday, March 13, 2025

Birthday Wobble

 I am soooo thrilled to be the feature for this challenge - "I Like to Move it, Move it".  I am such a fan of interactive cards, so this is a delight for me.  I had soooo much fun creating this card and I am soooo excited for how it turned out.  

First of all, I stamped all of the images on copic friendly paper with Memento black ink and colored with my copic markers listed below.  Some images were dies so I cut them with copic friendly paper and then colored with copic markers. 
I cut two 4 1/4 x 4 1/4" pieces of heavy white cardstock and scored each piece at 1".  Do NOT adhere together yet as you need to place the acetate pieces in between.
  
Let's decorate the front of the card first.  I matted a piece of pattern paper onto a piece of purple cardstock allowing for an 1/8" border around all sides.  This is then adhered to one of the white cardstock pieces. The 1" fold should be towards the back at the bottom.  I started by using the front layer (balloons) of the #4980 Birthday Circlet MTF.  I die cut this layer with the coordinating die and then cut the whole circle with one of the #5726 Nested Circle dies.  I used the koala sitting in the teacup from the #5349 Koala set and cut him off of the teacup so that I could place him on the stack of presents from #5954 Woodland Bears set.  I only used the bottom three presents of that stamp so that it fit nicely in the circlet.  I popped the circlet onto foam dots and placed onto a stitched circle die cut from purple cardstock.  I then glued the bottom two presents behind the balloons and popped up the top present as well as the koala so that they sat on top of the circlet.  I colored several confetti pieces from the #5407 Birthday Cake GCH and adhered them to the front of the card.  I saved several colored pieces for the inside of the card.  

Now, for the inside of the card.  I cut several strips of acetate, about 1/2" x 3" for each item.  I arranged the images how I wanted them to pop up over the front flap of the card.  I glued each to the top of a piece of acetate making sure there is enough acetate at the bottom to glue between the 1" folds.  Once the images are glued to a piece of acetate, I then glued the bottom of the acetate to the back of the front flap fold.  When all of the acetate pieces are glued down, I took the back flap and glued the two fold pieces together, making sure the acetate pieces are glued in firmly.  I then finished decorating the inside of the card with pattern paper and purple cardstock over the exposed white cardstock.  Lastly, I added the final pieces of confetti to decorate.  

Below is a video of how the card wobbles.


I hope you enjoyed my card today!
Have a wonderful day and happy creating!!

Copics used:  E21, E50, E51, E53
W5, R20
Y11, Y21, Y23, Y35
RV55, RV63, V12, V15
G40, G43, B41, B45