Showing posts with label Cubbies. Show all posts

Thursday, July 31, 2025

Magnetic School Bus

 Happy Thursday AI Friends!

I have a fun little project today using the #5226 - Bus Cubbies.  This stamp set comes will all of the cute little animals, the bus and the treats on the top along with corresponding dies to cut each of them out.  Instead of a card, I decided to make all of the pieces magnetic.  This is cute on the refrigerator or a magnetic board for the little ones to play with.  


I began by stamping all of the images onto copic friendly paper and colored with my copic markers listed below.  I die cut each out with their coordinating dies.  I also cut each out of an adhesive magnetic sheet (sticky side of magnetic sheet against the cutting part of the die) to be placed on the back side of the colored image.  Peel each of the adhesive magnetic backings and adhere to the corresponding colored images.  Each of the pieces should now stick to the refrigerator or magnetic board and let the fun begin.  However, if you choose, you can create a magnetic base.  To do this, I cut a black and a white piece of cardstock using the #5062 - Rounded Rectangle A2 Double Stitch dies.  I also cut two magnetic pieces using the same die.  I adhered the magnetic pieces sticky sides together and then glued the white and black cardstocks to one magnetic side.  The other side will adhere to the refrigerator.

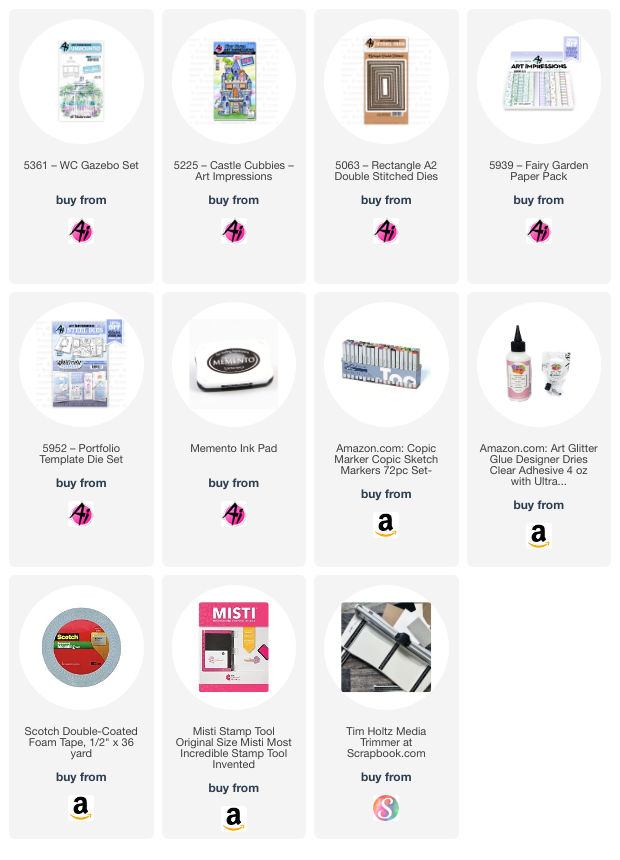
Hope you enjoy this project and have fun making it with other stamp sets, too.  Years ago I made a castle magnet with the #5225 - Castle Cubbies and it turned out sooo cute.  Let your creativity flow!  LOL!

Have a wonderful weekend and keep creating!


Copics used:  R20, R22, R24
E21, E23, E25, E40, E42, E44, E70, E74
W0, W1, W3, W5
YG95, YG93, YG91
Y32, Y35, Y38, YR27
G21, G24
B01, B000

Thursday, January 16, 2025

Unicorn Carousel

 Happy Thursday AI Friends!

Have you ever taken an image or die and put a twist on it?  When I saw the AI gazebo die (#5361 WC Gazebo set), it reminded me of the fair and the horse carousel.  So I decided to make the gazebo a carousel and the horses are now unicorns.  πŸ˜„ 

My card was fun to make but a little challenging due to the interactive mechanism.  This card can be just as adorable without making it move.


I die cut the gazebo with gold foiled cardstock and cut the slits to extend the bars behind the unicorns.  I decorated the gazebo with patterned papers from the #5939 Fairy Garden PP.  For each layer of the background, I cut slits for the mechanism by placing the gazebo die cut over each and marked with a pencil.  Then I roughly cut slits out of each so that the mechanism will work through all layers.
  
                                                        Pic 1

 I then made little tabs for the unicorns to ride along by cutting four 1/2" discs from cardstock and four 1 x 1/4" strips (see Pic 2).   Fold the strips and adhere to the paper discs as shown in Pic 2.  Feed the strip part through the slits to the back layer and adhere a round paper disc.  At this point, you can test to make sure these discs slide nicely up and down.  If they get stuck, just take an X-acto knife and shave a little off the sides of the bars to widen the track.
 I used the My Favorite Things Up and Down interactive dienamic as a template for my card.  Since this die set is for a larger mechanism, I had to make my own "T shaped" mechanism (Pic 3) to make it work for this card.  This was my challenge but I finally got it to work.  I used the MFT plastic spinning discs where the track goes through the disc.  A bead or button may work better and you wouldn't have to feed the track through, but I didn't think of that until later.  

                    Pic 2                                                            Pic 3

  Place double layered foam tape around the edges on the back side, making sure you don't hinder the mechanism.  Place onto the card base.

I stamped the unicorns (#5225 - Castle cubbies) with memento black ink onto copic friendly paper and colored them with my copic markers listed below.  After coloring them, I die cut with the coordinating dies as well as die cut an extra one of each with heavy duty cardstock to layer behind for stability.  Adhere each of the unicorns onto the paper discs showing through the front side of the card.


So, that's my card for today.  Hope you enjoy it!
Remember to put a "twist" on some of your stamp/die sets.  It's fun to see where your imagination might take you.  Make sure to share with us by entering the bi-weekly challenge for your chance to win a free stamp set.

Copics used:  N0, N1, N2
R20, Y11, G40, BG000

Thursday, December 5, 2024

Teeny Tiny Card

Hello AI Friends!

I'm so excited to share my "Teeny Tiny" card for the Teeny Tiny challenge.  This could not be any smaller but it made for the cutest little card and you can make any shape card with any die that you own.  It's so easy and you will LOVE it!  I bet you make this style card in bundles once you see how fun they are.

I decided to use the shoe house from the #5935 Fairytale Houses to create my teeny tiny shaped card.  I also used a couple of the fairies from the #5345 Fairy cubbies.


I started out by stamping my images onto copic friendly paper with memento black ink and colored them with my copic markers listed below.  I die cut the images with the coordinating dies that come in each of these sets.  I also cut two extra shoe houses out of plain white heavy cardstock for the card base.  I cut one extra of the fairies and the flowers out of the heavy cardstock to add depth to the image, as well as stability, instead of using foam tape.

To create the card, take the two shoe houses cut from the heavy white cardstock and stamp the sentiment onto one of the houses.  Score, and fold back, at 1/2 inch from the top.  Place glue only on the top edge from the fold and above.  Take the second shoe house and place over the sentiment layer.  This should create the actual card.  Place glue on the top shoe house and adhere your colored image to it.   Decorate with the fairies and the flowers and your teeny tiny card is finished.


I hope you enjoyed my card today and you try this method out with some of your other stamp sets.  You can make the fold on the left side as well, depending where the fold would be better placed.  The top worked best for this image.  
These would make cute little note cards to put in someone's lunch or backpack or on the front of a gift bag.

Enjoy creating!!

Copics used:  B000, B00, Y000, R000
T0, T2, T4
E51, E53, E55, E57
Y13, Y15, Y35
R22, R24, R27, R81, R83, R85
G40, G432
BV11, BV13

Thursday, October 3, 2024

Barnyard Fun

 Happy Thursday AI Friends!

My card today was inspired by the current challenge "Farm Fresh".  I had a great time designing this interactive card with all of the little cubbie farm animals from the set #5180 - Barnyard Animal Cubbies and the truck from the #5596 - Harvest Farm Truck.


I began by stamping the images on copic friendly paper and coloring them with my copic markers listed below.  I also die cut several hay stacks from the #5838 - Fall PP and inked them with Distress Oxide Vintage Photo to give them texture.  Where did I get the die for the hay stacks, you ask?  I improvised and die cut the porch plant from the #5490 - Front Porch Farm House.  It had rough edges and without using the stamp, I thought it could pass for hay stacks.  Now that I told you, maybe it doesn't look quite like a hay stack?  πŸ˜‚  

To create the mechanism for the doors:  For an A2 size card, cut base cardstock at 5 1/2" x 5 1/2" (score at 4 1/4".  Cut two pieces of colored cardstock - 1 1/4" x 5".  Score down the middle lengthwise, turn and score at 1 1/4".  Fold one corner over to score line and then fold other corner over to score line.  Should create four scored triangles in that 1 1/4" square.  With right side facing you, cut 1 1/2 triangle off (as seen on left), then do the same on other piece but opposite side of piece.  As seen on the right side, fold long piece of triangles over the front.  Glue the tab (indicated on right by black marker).  Place point in fold and line up right side with white cardstock.  Fold down the top to adhere.  Then glue the bottom of the right half down to the base of the card (see Pic. 2).  

Pic. 1                                                                            Pic. 2


Fold back each side of the mechanism (Pic. 3).  Cut two pieces of colored cardstock for doors - 3 1/2" by 2 1/8".  Adhere in place (Pic. 4).

Pic. 3                                                                            Pic. 4

Hint:  youtube "Dual Pop Up Card" for video tutorial.  

Hope you have a wonderful day.
Keep creating!


Copics used:  E21, E23, E50, E51, E53
R20, R24
Y15, Y17, Y35
C00, C0, C1, C3
B000, B91, B93, B95
YR16
    

Monday, December 4, 2023

Clean & Simple

 The last challenge of the year for Art Impressions is "Clean and Simple".  Seems I'm always trying to add something to my cards to "spoof" them up, but this challenge is letting me keep it simple, so no adding bling and embellishments, etc.  I used the Art Impressions Gingerbread Cubbies and the new Joyful Snowman Set.


First I stamped the sentiment from the Joyful Snowman set onto a piece of white cardstock and cut it with a stitched circle die.  Then I cut another circle die just a tad bigger with red cardstock to make the frame.  I temporarily placed the white circle die cut in the center of a 4 x 5.25 piece of kraft cardstock and using my misti stamping tool, I positioned a variety of gingerbread girls and boys stamps from the Art Impressions Gingerbread Cubbies set around 1/2 of the circle die.  I inked the stamps with white pigment ink and stamped onto the kraft cardstock.  I turned the paper around in my misti and stamped the other 1/2 of the cardstock to finish the circle.

I mounted the kraft cardstock onto a piece of red cardstock and then onto a 4.25 x 5.5 card base.  I glued the sentiment circle onto the red circle frame and popped that up with foam tape onto the kraft cardstock in the center of the gingerbread girls and boys.  I colored one gingerbread boy with copic markers and die cut with the dies included in the set.  I tied a piece of twine into a bow and glued the gingerbread boy in the center and attached to the card.

Ta Da done and it took me less than 45 minutes to create two cards.  

I send about 75 Christmas cards out every year and for some reason I always make them so much more involved.  They take me months to complete.  Why don't I keep it simple?  They are just as cute!!  AND so much easier!!!!  

Enjoy and hope you have a Merry Christmas and a very Happy New Year!!


Friday, August 11, 2023

Tag you're it!

 Tags are the theme for this week's Art Impression's challenge.  What better way to add fun and flare to your package than with a tag.  You can add them to cards, presents, scrapbook pages, etc.  I chose to make a window tag card using the Art Impression's Tag Stitch Die and the Castle Cubbies stamp set.


  I stamped the images on cryogen white cardstock and colored with my copic markers.  I cut the front of my A2 base and pattern paper with the Tag Stitch Die to make the window.  I then cut another tag from the pink cardstock to make the inside tag base for the castle.  The sentiment came from the Cubbies set and was cut with the banner tag from the Stitch die set.  The unicorns, dragons, princess and knight are part of the Cubbies set which includes the individual stamps and dies.  So much fun to color and arrange within the doors and windows of the castle.  

Hope you enjoy my window card and have a fun day crafting.

Sunday, March 21, 2021

Mini card

 This week's Art Impression challenge is "Itty Bitty" so I decided to make a mini card out of the Art Impression's Gingerbread house from the Gingerbread Cubbies set.  

  To make this a card, I folded a piece of cardstock and then placed the house die with the left side just over the edge of the fold so that when you cut the house, the left edge doesn't cut, but instead, is the fold of the card.  To finish the inside of the card (no windows or door cuts), I made another die cut of the house on scrap paper and traced it onto plain white cardstock, then I fussy cut it out, trimming the left side to accommodate for the fold and glued it to the inside.  Now you have a plain inside for your sentiment.

 You can make almost any die cut a card by using this technique.   I think the Art Impression's school bus from the School Bus Cubbies set would be adorable as a flip up card.  Gotta try that one next!  I've been wanting to make this Gingerbread cubbies since Christmas and just never found the time, so who says you can't make Christmas cards in March.  πŸ˜‚  This would make a great tag on a Christmas bag!  Can't wait to make more!  Too stinkin' cute!!


  These little cubbie sets are soooo fun to make and play with.  Hope you get to try them out for yourself! 

  Enjoy! 

Sunday, October 25, 2020

Mini Magnets

 Art Impressions challenge this week is Tiny Treasures.  I used the AI Castle Cubbies for this challenge, which includes a castle, a knight, a damsel, two unicorns and three dragons.  I thought this would make a cute little refrigerator magnet for the little ones to play with.  You know how your grandkids always play with the magnets on the fridge, well here's one for their tiny little fingers.  I made these with magnetic tape and they die cut nicely with the dies that are included with this set.  I cut one and then turned the magnetic tape upside down and cut another one.  Peeled the tape off the backs and stuck them together so that both sides were magnetic.  I used double sided tape to adhere the colored image and, tada, you have a cute little magnet.  Did the same with the castle and popped out the windows and doors.  Each piece is magnetic and movable so the little ones can rearrange and play all day (well, until their attention span wears out πŸ˜‚)


This would be cute to make with the other cubbies sets.  Can you imagine the little bus or the barn with the animals?  Very fun and easy to do thanks to the dies included with these stamp sets.  One word of warning, these magnets are tiny so beware of your youngest little ones getting ahold of them.  

Have a great day and stay crafty!!